Ok so let’s get the loot out of the way – Yep zilch purchases 😱. Well ok not quite…..
Cash buy £2, which is just as well because I forgot to bring a wad of cash…..
Yep no cash on me and of course I saw plenty at the bring and buy………lots of frustration.
It then got to 15:30 (that’s another story for lower down) and I finally spent some money….
More to follow on this…
The show was “packed to the rafters” – I arrived late (for me) at 11:00. Then took an age to find a parking spot, literally there was no room left and certainly no one to tell you if there was some less obvious spaces.
The usual set up and lots of regularsNo figure for me – clearly there were more than 500 at the show more like 5000 – I jest.
I got in and immediately found some obvious bring and buy purchases in the new awning area at the main entrance but then realised I had no cash so moved on. I did a full circuit twice before some refreshment.
I would say noise levels were vibrant to say the least.
Here is my selection of pics, clearly not necessarily the best – whatever that means – but things that caught my eye.
As always click to get the bigger picture
Crazy giant RISK game 😁Intriguing RPGAction ACWI have that book but alas not the figures Small table but intense activity Surprised it had not happened before Prewar France was more bonkers than Britain My memorable demo of the day
So I also got preoccupied with planes again…
Some more table envy
Impressive tanksImpressive tanksAtmosphere but get that tiger outa my way!I like bodkins demo’sRolling fields Fun burrowsAnd badgers 😁Loaded tables are not my bag but I have always liked the figure range Something a bit different Nice figuresSome nice inter war action A winter scene The town makes the difference for me
A few more…..
Some serious facesAnother biplane Looks innocuous on first lookStill innocuous Wait their a bit odd Aaaargh it’s the MartiansScary camera shake 🤣A glut of Martians?A horde of steam tanks Sparking into life maybe 🤔 Ship ahoy A full consignment of stirrers sits idle. Obviously few modellers at the show this year!
Ok that was a bit tongue in cheek, so now for the highlight – a game. In the afternoon I played Chris’s not quite mechanised Crete 1941. My guide was from Boston but I forgot his name: Sorry. Anyway he explained the game basics and led me through a few rounds which saw my Australian forces drive the Germans back.
My mission was to boot the Germans out of Khania and I did!Close up of the actionRules guide on a board – easy to see
The rules are a neat combination of grid but given a wargaming look with 15mm figures densely occupying the hexes. The variable scales used for buildings, tanks, ships and aircraft tell you this is an abstract however the look is really good and the detailed vehicles especially are not regimented in style or painting, so you get a gritty result.
The rules are quick to pick up and give you the headaches of logistics, resources, ammo, positioning, energy for attack and indeed tenacity of defence.
Needless to say I enjoyed playing the game which is why I found myself shopping at 1530. And now I have a copy of Chris’s rules but no forces, I face yet another wargamers dilemma: Do I start another project 😱
Thanks for the chats Chris and a great scenario to play in.
All in all a great day for me at the Other Partizan.
Having missed the spring partizan show I did not want to miss the autumn offering.
The crowd descended on Newark in a leisurely fashion arriving half an hour after the gates opened. We expected a shorter queue but no it was still the length of the building and some.
Once inside (fairly quickly as it happens) the place was heaving.
So my first comment is it was too crowded to take in all the excellent displays. I am not sure what you do – if the show is less congested people will feel it’s not thriving etc. I don’t think we will see a return to the two venue set up that saw competition games plus more traders in another hall?
In short maybe it’s me but it felt busier than ever?
So overall a busy, popular and I expect successful show.
The congestion also deterred me from taking as many pictures.
Turning to the retail side – all the usual suspects were there but just maybe a few less new offerings and less 3d print offerings visible?
There were no showstoppers in retail as far as I noticed.
I did throw some dice at Chris Kemp’s NQM game – I failed to drive away the Germans from longstop hill…..Chris uses on board indicators to avoid lots of rule checking and I think the scenes are intended to look congested so it’s abstraction might not suit everyone. The important elements are the variety of components that work together to enable the fighting elements to launch and sustain an attack or defence…….a neat grid game which is now a published ruleset.
Brits under the kosh Bring up the artillery – that was only partially successful Excellent table set up for participation with simple visuals.
So what about the table glamour…….
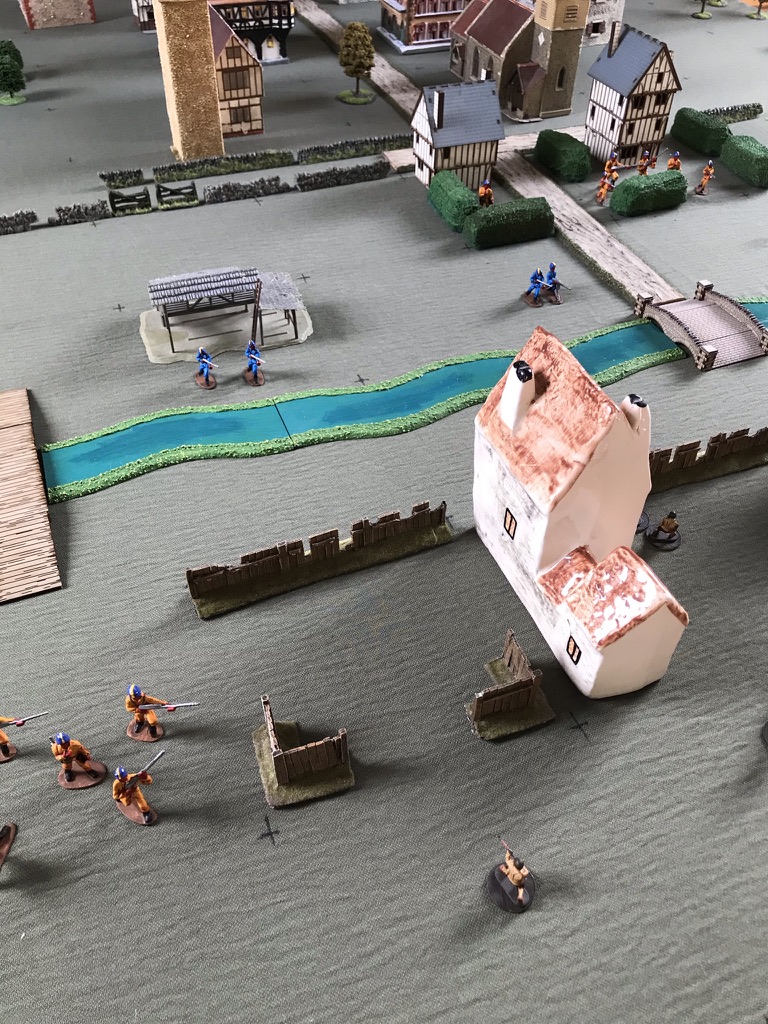
Omaha was excellent giving some true perspective Not your regular ww2 tank fastOk there were some behind that building I can never resist the kriegspiel style Quirky but popular participation gameOmaha again An engaging gameUnusual subject The game presenters included bramley barn wargamersSome interesting background Some excellent aircraft Early tech on show as well Despite two giant tanks of coffee the allies seemed to make little headwayPaper soldiers-fantastic Best show backdropHobbit warsAnd behind the backdrop useful vertical display space. Popular with Railway Modellers yet not popular with wargamers but here it works a treatYarkshire wargamer with serious amounts of plate on showThose planes again! Kept coming back to this gameMore paper armies ACW this time A traditional? 28mm game seven years war? With some great sceneryThe castle was a gemYep 1-72 Greeks 1941The Greeks holding off the Italian assault Italians make a bad job of itItalian armour about to get pummelled Wonderful aircraft again Plenty of source material on show for a rarely gamed front in ww2?Another excellent aircraft to give period flavour Soon the big guns will open up
That’s it except to say a well organised and enjoyable show means I plan to return.
Corrugated cardboard was the trigger material for my solution
Just like John at just add varnish I have joined the season of scenery community challenge and started with an Italian theme.
This piece is still unfinished but has made it from idea to concept in only about five years – so that’s about four and half years procrastination plus various false starts in materials and a bit of design. And finally some tv viewing and Dave Stone’s scenery season challenge.
Eventually the material choice helped drive the form
Grid gaming by Mike Smith is a great rule set and early on in my Italian independence wars project I thought a couple of hilltop towns would be ideal for the grid.
Then the procrastination started – which materials and what style?
I use a 50mm grid with 40mm based units all square. The toy soldier abstract had resulted in these block buildings a couple of years ago.
Initially I was absolutely into the idea of wood and it would be modular and come apart. Then when I started to think about details wood felt wrong. The framing of the town was to be the city walls and slim, this was leading to fret saw country and simplicity of the idea was waning.
A long delay ensued.
Style wise I was looking for the abstract and Joe morschauser scenery pictures – more grid games – drew me towards something that could still accommodate units as a garrison.
I came up with the cruciform of two bisecting streets with four quarters to the town – in Mike smiths grid game the towns are 3×3 grids
In the end watching the giro this year suddenly prompted a “just do it moment” and as it happened cardboard kept coming into my head as a possible material and multiple postal deliveries reminded me of this free material.
But it needed to have some structure. What to do?
Then I remembered the flat scenery that are found in paper boys armies booklets. These have interconnecting cutouts that give strength to the arrangement.
These interconnecting card pieces now became walls and the corrugations gave me another idea.
Plus other things on this long journey fell into place.
The whole idea of abstracted block buildings came in part from kids toys like this one – just add imagination….In another direction this flat pack helped the idea that 3d solids is not the only way to create a 3d effect.
Maybe I could use these simple cut outs approach?
I did and I quickly developed some solutions to get the elevations I wanted to see.
The buildings had been done a few years ago during the wood era.
I added the church in card with a removable front. The tower is a work in progress.The corrugations prompted cypress trees again in corrugated cardboard and cocktail sticks In the end even the wall overlaps suggest buttressing
Well that’s it and it remains a work in progress but I think I have found my modular abstract Italian hill town.
I had previously encountered Bob’s grid rules in the History of Wargaming publication of Joe Morschausers early 1960’s book on wargames. Although a contemporary of Donald Featherstone, Joe’s rules better resonate with 21st century rulesets in my view.
This purchase collided with my stop-start diversion into “pound store warriors” and ultimately a bit of sci fi gaming. Man of Tin had been instrumental in starting me to look at these figures that did not even look like green army men. It is a measure of my lack of progress (the figures arrived during lockdown……) that my recent first game only fielded half a “sci-fi” set up. Some WW2 Russians and Americans filled in as opponents and neatly delivered the unexpected scenario and indeed a back story into the bargain.
Captain Parker of the US 21st Army held the edge of Exetown along the river Exe. In the town were the Russian 33rd Army forces led by Senior Lieutenant Yashin.
The front such that it was involved nothing so much as a watching brief. There had been “no action” when the two forces had closed up to each other – just looking and with even the odd conversation exchanged across the river.
When the Russians were surprised by the Aliens in Exetown all that changed, Yashins troops just ran hell for leather at the Americans who fortunately hesitated to fire long enough to spot the new enemy beyond. Somehow the Americans could sense that the Russians were not trying on a surprise attack – they were genuinely running for their lives.
So the scenario made itself – The renewed Allies have to fight off the Aliens and at least hold the river line. The Aliens have to drive the humanoids off the table.
Rules
Rules used were The Portable Wargame by Bob Cordery. I used the solo option.
Only rule change of note was to assign the “alien blasters” 5 dice per firing round. So they were like super heavy machine guns in effect. But they had only a grid range of 2 instead of 3.
I also permitted some unit size differences. The Aliens had fewer units but 4 or more figures per unit. The Allies were basically 3 man units.
In the event the Allies had a higher break point for exhaustion yet got there quicker as their units were destroyed more easily.
I had just played a game so had the table set up plus some figures that in turn fed the scenario and storyline. My grid was 8 long x 12 wide, using 6 inch (150mm) grids. Not very portable!
Opposing Forces
Allies (Exhaustion Point is at 6 units left)
American (First Lieutenant Osteen)
CO unit 3 figures
rifle squad 3 figures each
rifle squad
rifle squad
rifle squad
rifle squad
Russian (Senior Lieutenant Yashin)
CO unit 2 figures
Machine gun unit 2 figures
machine gun unit 2 figures
rifle squad
assault squad
rifle squad
Aliens (Exhaustion Point is at 3 units left)
Blue Troop (Colonel Blue)
Colonel Blue and Heavy Machine Gun 2 figures
Blaster unit A1 3 figures (one figure armed with what looks like a bazooka)
Blaster unit A2 3 figures (one figure armed with what looks like a bazooka)
Yellow Troop (Colonel Yellow)
Colonel Yellow unit
Attack unit A3
Attack unit A4
What happened?
First up – the Allies (US/Russian) threw high in the first 6 moves for “first to move”. The Aliens took heavier losses as they advanced, then at close range they began to wear down the Allies. Exhausted the Allies had to hold their line and so my scenario backstory kicked in and the allies retired rather than simply continuing to hold under the rules.
So a new ruleset, some abandoned figures and also a new grid surface** combined with a storyline from nowhere, resulted in an excellent game.
The game played out in 12 moves and took half a day as I left it quite a few times to do some real life activity! So I guess maybe it took about 1 hour to 1h30m to play the 12 turns including set up and take down. Remember I already had the table set and in fact the US/Russian troops were from that game.
I suspect that this sort of game is easily a one hour set up, play and put away operation.
Biggest impact for me was the ease of play and how it simply connected with my rather mad scenario. So very high on the Enjoyment scale.
Here are some episodes from the game.
The Russians race across the bridge towards the stunned AmericansAs First Lieutenant Osteen gathered his men Senior Lieutenant Yashin called his men in and sent a squad to the sawmill.Lieutenant Yashin finally gets a sighting on what appear to be different types of enemy foot soldiersA brisk firefight at the edge of town as the Russians retreat across the unfordable river Exe by the main bridgeThe enemy pursue the russian squad to the sawmillOn the right flank the US troops, in the morning sun, began to get a sighting of their opponentsagain what seemed to be a mixture of enemy troops in their bright uniforms loomed into view
The brightly uniformed enemy had been easy targets and the allies gained an early advantage decimating the orange unit that tried to reach the main bridge first – the remnants retreated to the hedged half timbered house where they stayed for the remainder of the battle
The defenders in the sawmill got a shock as the blue unit and orange units combined fire felled many russiansIn the centre the firefight was heating up with one Lieutenant Osteens squad falling victim to the accurate enemy fire. On his right the remaining russian machine gun team continued to stop any enemy advance on the bridge.As Yashin crossed over to the now threatened right flank a US squad took aim at the enemyin the open the allies were decimated – Petrov and Lefebvre fell hereThings were going from bad to worse on the right flankAnd now on the left flank the orange unit stormed over the foot bridgein the centre it was still a stand offYashin managed a counter attack on the right which drove back the blue blaster unit and weakened the orange unit.but the enemy responded in turn and Yashin fellOn the left flank the footbridge looked lost as the US defenders were being overrunbut a heroic effort by the left and centre threw the enemy back, they even silenced one of those dreaded “blasters”only for the enemy to attack again – the last allied squad moving up to the footbridge at that momentThe uneven contest at the footbridge was short and the allies lost and with it their left flank as well
With both flanks destroyed Osteen, Kachalin and the remnants of both Russian and US combat teams retreated from the field.
The Aliens move on the main bridge over the River Exe as Osteen prepares to retreat.
* – tacfos or “the aliens came from outer space!”
**- for this game I used one of my new grid sheets. I have been experimenting with different surfaces when it comes to grid games. Like most Board games, the grid surface is integral to the game. So I have not yet settled on the best grid surface for any one game. Given I have quite a few cloths and boards for my “measured” table top games this should come as no surprise.
The empty field – the trees wonder what will happen next?
I have slowly started to look at some grid gaming set ups. My starting point has been that they would aid campaigns and to that end allow quicker solo games. I opted for two 3’x2′ boards which could then give me a 4’x3′ table which also figures in Neil Thomas rulesets.
ideas still in play – how to represent rivers and buildings? hills are simply another gridded block shape to suit.
As a bit of a test I used a Neil Thomas scenario from the C19th European Wars book (NT19e) – the Cristinos v Carlists, in my case Piedmont squared up to Austria.
I use 40mm square bases for my 19th century games and I have chosen a 50mm grid – i.e. no perfect fit of base to grid square. And for this test I used essentially formations from Neil Thomas NT19e. The exception being that my square 40×40 basing really distorts the column or line option choice.
Garibaldeans march in my attack column option – I reserve a single base wide column of 4 bases for marching only. Firing lines are 4 bases side by side and don’t advance or retreat, but can wheel.I have Artillery men both on one large base and also individually as shown hereAbstraction – these Neapolitan Riflemen in a built up area may still simply be on a block of a different colour or with buildings/features!I quite like Neil Thomas unit conditions – Fire and Fury and other rulesets in mid 19th century warfare also seem to opt for this type gradationI did not find the grid a problem and it did the job of of having a tape measure on the board at all times everywhere. Also manoeuvring is hard work once you move to multi based units. NT19e allows turning (spinning)on the unit centre (abstraction again) so fits nicely with a grid approach.The undersizing of base to grid feels right for me.Neil Thomas rules do not feature command bases but other rules I like do – so I plan to use single grid base for lowest discrete command with next up having two grids covered and the top man having three of even four bases covered. The bigger the command base the further back from the action is better for them – having no attack or defence values if contacted.Bare bones – right now it feels like I am heading in the right direction.
Table Top Battles – the Naval Rules, have been occupying my time recently. NavalTTB are a very simple set of rules using a grid based set up. They are part of a compendium of rules featuring fantasy, air, siege and land based warfare.
Having played the basic rules I could not help but tinker with them.
The Extras
First up, I used a 50mm grid and not a 100mm grid permitting greater granularity in manoeuvre.
a 50 mm grid gave each 100mm square a centreline to sail on. In turn all “lines” became sailable with some rules tinkering. The spaces cease to be occupied directly.
Second I took the single broadside characteristic value of 3 and changed this to three possible values – 3,2,1. I also allowed three steps in the degradation of a broadside after being hit. So a ship might start with a 3 then go down to 2 and finally 1. Note the numbers 1,2,3 are the actual values added to the die roll for a broadside scoring a hit.
The Blue Squadron’s ill fated Chippewa has lost all sail, while all its broadsides (3 per side) and its one of its close action firepower (2xCr=Crew) remain intact
I also permitted some ships to have say a 2 or 1 rating for their broadside from the start reflecting a weaker armanent. And then I still allowed those ships three hits absorption before that broadside would fall silent. So this might be 2,1,1 or 2,2,1 or even 1,1,1.
I left the score tables, crew attack and command values unaltered.
Finally I altered the sailing manoeuvre value. Essentially a hit on a sailing capability each time reduces the speed (movement per 100mm square) by 1. I applied some options, as in a large ship could have say a maximum of 2 while a small ship had a value of 4. In either case degradation of manoeuvre gave more granularity. So a faster ship might have “S” values of 4 then 3 then 2 and then nothing while a slower ship might have “S” values of 2,1,1, before being unable to move.
One final change I made was to sail ships on the “line” of the grid and not in the space. A ship turns on its centre and cannot overlap another ship when it does so. The standard rule of no ramming was retained.
This was a result of my using a 50mm grid.
The unintended outcome of this movement change was for ships to become stuck alongside each other. That felt ok though.
The Battle of Tinckermann – Fauxterre 1816
The Red Kingdom had found out that the Blue Kingdom was attacking some of its provinces and making an amphibious attack. The Red Kingdom dispatched a strong squadron of ships to disperse the enemy fleet.
The Blue Kingdom, well informed about the Red Kingdom actions sent a squadron to intercept the enemy squadron.
The Red Squadron
The Fortuna – a 3 decker 3 masted ship of the line
The Estedio – a 3 decker 3 masted ship of the line
The Meshuda – a 3 decker 3 masted ship of the line
The Zugarte – a 2 decker 3 masted FAST ship of the line
The Blue Squadron
The Chippewa – a 3 decker 3 masted ship of the line
The Allegheny – a 3 decker 3 masted ship of the line
The Abellino – a 2 decker 3 masted FAST ship of the line
The Firefly – 1 decker 3 masted FAST Frigate
The Lyra – a 1 decker 3 masted FAST Frigate
The Blue Squadron attacked the Red Squadron in two lines while the Red Squadron attempted to keep a single line and sail between both enemy lines attacking them at the same time.
Early on the Chippewa lost all sail control and drifted out of the battle. This in theory evened up the battle between 4 ships on each side. Then the Fortuna became caught between the Allegheny and the Abellino.
The Allegheny and Fortuna are in the positions that framed the rest of the action while Chippewa in top right drifts out of the action. The blue/red dice indicate a ship has acted in the turn.
Then the Zugarte, Estedio and Meshuda isolated the Allegheny although the Firefly gave aid.
Firefly attempts to aid the Allegheny
At this point in the battle both the Allegheny and Fortuna were stopped and the other ships manoeuvred to support or exploit the situation.
The final action saw the Red Zugarte and Estedio take on the fast Blue Frigates Lyra and Abellino. Lyra and Estedio had their sail control destroyed.
Lyra (blue) and Estedio (red) are stopped with no sailing power left – they have orange dice on them
At this point the Red Squadron broke off the action and the Meshuda escorted the Zugarte (now with no armanent left) away.
Actually the 12th game move finished. The standard rules are a 12 move game.
Outcomes
At the conclusion of the action the Red Squadron was driven off having to abandon both Fortuna and Estedio – both ships suffering so much damage to their masts that they could no longer manoeuvre.
Firefly and Abellino make sure the Red Squadron make plenty of sail.
The Zugarte had lost all its broadside and crew fighting power. It could still make sail and was escorted away by the Meshuda, which still had both fire and manoeuvre capability remaining.
The Blue Squadron despite driving off the Red Squadron had suffered badly.
The Allegheny had lost all sailing ability although it still had some broadside capability. The Lyra likewise could defend itself but needed repairs before it could make sail again. Early in the action the Chippewa had suffered complete loss of its sailing ability and as the action moved away it sustained hardly any damage keeping all its broadsides intact.
The Firefly retained sailing and fighting ability as did the Abellino – these two vessels were to be seen driving off the Red Squadrons Meshuda and unarmed Zugarte.
And so ended the Battle of Tinckermann with the Blue Kingdom free to continue its land attack on the Red Kingdoms provinces.
A mark 1 ship card – to make them reuseable I inked them in.A mark 2 ship card! – more improvements required methinks
Afterthoughts
The difference between a win and a possible draw occurred in the last move of the game between slightly unequal forces. I will test this a bit more. It does mean the game hangs in the balance. And for the soloist it is not easy to see who is winning where – always a bonus.
If I was inclined a permanent sea table along with 3D models would drastically improve the visual aspect of this game. Indeed I do have some models from wizkids 2005 pirate game. Somehow I preferred the 2D test set up.
So this has proven a surprising distraction from my land battles. I tend to use TTB for land battles when the action does not lend itself to using Neil Thomas One Hour Wargames or 19th Century European Warfare Rules.
I like to think if Neil Thomas wrote some naval rules then NavalTTB would not be far off the mark.
Shieldwalls – Dux Bellorum, AMW, OHW and Table Top Battles Rules reviewed
Over quite a few posts I have reported on my use of rulesets to play battles between shieldwalls. In most cases the two opposing forces were mirror images. This meant the mechanisms in the rules might be more transparent and then the rules could be better contrasted in my mind.
Having said all that “one swallow a summer does not make” so everything I write here is caveated – only multiple playing’s will help you like or dislike a ruleset fully in my view.
My consideration of the rules is of course subjective, and my criteria may not be to everybody’s liking. So, my criteria are
Reading the rules (understanding/comprehension) – both at the start and when referencing
Ease of Play – how the game played
Outcomes – the outcomes during the game and overall at the end
AMW
Let’s start with AMW. First I should say that from nowhere these rules have come to represent a modern take on what “I remember” I enjoyed about rules from the 1970’s: Above all simplicity. I used the Dark Age ruleset straight from the book.
The rules take up a couple of pages and are in clear large print and easy to understand. I printed the relevant pages as the paperback is a “tome” and short of breaking the spine it is not easy to “use” in a game.
The rules gave a simple mix of troops and are explained in a chapter on why the troop mix was chosen and what they could and could not do. The Shieldwall concept was well covered.
Saxon Cavalry were permitted, and I think Neil is more on the “they were everywhere in life so why not some on the battlefield”. He restricted their presence and impact.
Selection of the 8-unit force was straight forward. I added some variety in the choice of light troops. I used my 80mm frontage IMPETUS bases showing 1/72 plastics. Each base equates almost to 4 x 15mm scale 40x20mm DBA bases as referenced in the rules. Mine are 60mm deep “for the look” as IMPETUS suggests.
The dice to hit and dice to save has some interest for live opponents although for solo play arguably it simply prolongs the playing time. AMW uses the two-step process to provide the layered differentiation between such a small number of unit types to cover several hundred years of warfare and army types.
It did help to keep the stronger type of unit – nobles in the field longer than the peasants.
The first losses also triggered more (domino effect) as AMW uses morale effects to pile on misery when dice are thrown low.
The battle lines were deliberately aligned and close together as the intention was to show two equally sized shieldwalls simply coming together. And the erosion of the 16 hits or 4 bases in DBA speak resulted in some quick breakthroughs. With no need to put the units in base to base contact visually it did not look quite like two shieldwalls: More like roman maniples!
The use of some cavalry may have speeded up the result although I think the outcome was not in doubt.
The feeling and reality of individual units meant that flank attacks were inevitable, and these were the main mechanism of destruction. And the lines once met were static – which cuts both ways – that’s what happened – short of logging loss of points there is not much game movement.
The cavalry interventions were easy to achieve as there is no restriction on command and control.
Finally, the structure of the ruleset with core rules and some simple extra rules simply cries out for more house rules.
In my battle report I suggested a way to deal with anglo saxon cavalry in battle that might more reflect their power as pursuers and opportunists.
Because of the apparent strength of shieldwalls in AMW I then play tested cavalry against a shieldwall. The result was a defeat for the cavalry army. It showed you need to put the whole force jointly in together as the attrition is such that late comers – in my case the token infantry shieldwall were simply outnumbered and picked off in turn.
Coordination is in the hands of the gamer through movement of units and their proximity. This second game also confirmed that archery is quite potent.
Overall, I felt that AMW is better suited to combined arms battles as opposed to a slogging match. Given the breadth of periods covered by the rules these two battles were enjoyable enough for a further outing at some point.
Dux Bellorum
These rules are more modern in concept with command and control central to their use.
Again, the units were 1/72 plastics on 80mm x 60mm IMPETUS bases. Losses would be recorded use dice and tokens.
The points-based game with stat lines for each unit type were easy to understand yet not so memorable as AMW was to me.
I could not resist a slight difference between the forces with one side having mounted skirmish troops equating to a 1-point advantage – 31 v 32 points. Near enough.
The ineffective skirmishers and straightforward meeting of the two-battle lines using the leadership influence made this all feel realistic to my mind.
As in DBA pushbacks showed visually where units were losing the fight. The battle line was still retained as the movement was small.
Distribution of the leadership points can make or break units, although centrally controlled by the gamer I felt this reflected the fact that a line would comprise areas of strong men and areas of weaker maybe reluctant fighters.
The dice head-to-head felt more interesting than the hit versus saving throw of AMW. In a face-to-face game this might also make the exchanges more exciting.
Again, flanking forces including cavalry provided local advantage as the game moved into its later stages.
Dan Mersey talks about the swirl of battle and this was true although the battle line was still discernible late in the game.
Both armies approached their own demise and it was just a few points either way so although the king’s men lost it could easily have been the rebels.
This felt like two battle lines slogging it out and even though there was some “flanking” it was not significant. The forces to a units front mainly did the damage first.
Table Top Battles
The previous two games used “measure and move” rules. Table Top Battles was “gridded” removing any need to get the tape measure out. I have used gridded wargames before with Peter Pigs WW2 rules being memorable.
While many people will know and have played either AMW or Dux Bellorum I reckon TTB by Mike and Joyce Smith will be new to most people.
Published by Partizan Press the ruleset has a feel of looking backwards in the same manner as AMW. The grid though makes for a different feel altogether.
For two shieldwalls the square grid was perfect.
The rules are covered in a couple of sides of A4. Initiative is gained each turn so you can get the effect of a “push” by one side as they win the aggression dice throws successively.
And that aggression is simply a +1 on all dice throws. Getting the initiative also means losses are inflicted before the opposition replies – extending the benefit of being the aggressor.
TTB starts with some simple rules and like AMW adds a few mechanisms to layer the differentiation. The difference is more about advantage in play rather than troop type.
I used the less brutal rules option of push back rather than straight destruction. I don’t think this affected the outcome too much. And it was more appropriate for the slogging match here.
Again, the differences in forces were out on the flanks with one unit of light cavalry in play.
The head to head style of resolving conflicts felt like Dux Bellorum and flowed well. Combat can be grouped so you can really speed up results of several units being joined up for a particular combat round.
While firing is alternate and affected by the aggression advantage, combat is simultaneous. This seems to work ok.
The mass combat meant that push back saw a whole line move back – a bit mechanical – less attractive than Dux Bellorum. In the later stages the erosion of flank units meant push backs became messier and trickier for some units – no room to retreat leads to destruction. And with grids there is a bit of space management to be done and in the right order – shepherd your resources – quite board gamey or chess like. This will not be pleasing to some.
In close combat the mounted and foot skirmishers die easily – I like that.
Finally, the king’s men turned a flank, and this crumpled the rebel line although none had the ignominy of being pushed off the table edge itself. I had not considered that when choosing a very small battlefield of just 2 foot 6 inches deep.
The king’s men were about to really destroy their enemy when the 12th move was completed, and the game ended. A day is 12 moves in TTB. Victory was based on various criteria including base loss. The Kings men won on this measure alone.
TTB comes in a slim 42 page black and white softback A4 booklet. It’s 2-page battle rules are really aimed at supporting campaigns and scenarios. The design is oriented in that direction.
Overall, this was a quick game and the lack of measuring not missed at all. The bulk combats removed some subtlety. The rules are so simple like AMW that house rules can fix most objections.
Overall, I liked this set of rules and with some tinkering they might become popular with me.
One Hour Wargames
With just 12 bases (six a side) on the table this game should be quick.
One-hour wargames built on the reputation of AMW for a reliable set of basic quick play rules. Here the pursuit was an even simpler ruleset that gave a game in under an hour. The rules are really scenario based. I set up scenario 1 – the straight encounter of two equal armies. I ignored the force generator to retain two matched shieldwalls.
The rules in about one side of A4 are very simple. 15 points of value represents the “abstraction” of everything unique about a unit. Random losses tell their story – those losing least – obviously were the strong units!
The skirmishers were ineffectual and fought their own flanking battle.
The alternating slugging match by the shieldwall saw the two lines stand toe to toe with no movement, just points erosion to indicate the fluctuation of battle.
Eventually most of the units reached breaking point and some rapidly departed. However, the first to go were from the side that eventually won so it was not the case that once you gained a local advantage this would give overall success.
In this battle we started with only six units, so I allowed it to run to the last unit standing.
As a result, later on the flanking successes of each right hand meant the whole battle line swirled 90 degrees. And then it happened again. A visual demonstration of Daniel Mersey’s “swirling” battle description perhaps. After all there would be no dressing of lines with the leaders all to the front pushing at enemy weakness.
Overall these rules did feel similar to AMW and felt generic. They seemed to give the same outcome as AMW without the saving throw step. Sacrificing differences, or “layering” if you like, for speed of the game is one of those compromises faced by all rule’s writers and gamers. It is what you want out of a game that matters.
Table of Ruleset Criteria
Ruleset
Reading the rules
Ease of Play
Outcomes
AMW
Straight forward
Straight forward
All logical yet Lacked feeling for the period
Dux Bellorum
I often reread the small print! And a bit wordy at times
Once memorised easy to play
Logical and a good feel for shieldwalls
One Hour Wargames
Short and simple
Straight forward
Logical and yet lacked feeling for the period
Table Top Battles
straightforward
Straight forward or so I thought*
A whole battle line eventually got turned twice while the shieldwall fight itself felt ok.
*I made mistakes in all these games but more of them in the TTB – simple errors forgetting to do something here and there. I took more care with Dux Bellorum.
Overall score – brutally simple – rank 1 to 4 (4 is highest) direct preferencing with no ties and no weighting!
Ruleset
Reading the rules
Ease of Play
Outcomes
TOTAL
AMW
3
1
2
6
Dux Bellorum
1
2
4
7
One Hour Wargames
4
4
1
9
Table Top Battles
2
3
3
8
Surprisingly I am saying OHW is the best for two straight shieldwalls. That probably is true though, diverse forces with more movement would probably show up the limitations of OHW even against its stable mate AMW.
If you ignore the rules reading as being less relevant after many games, it’s a tie between Dux Bellorum and Table Top Battles.
And in the final analysis I have to say that it is Dux Bellorum that gets my vote as the most “shieldwall feeling” rule set.
The others all betray their origin as generic rule sets while Dux Bellorum shows its depth of consideration by the author for a very specific period.
So next time I put up a shieldwall or two for a battle it will be Dux Bellorum unless I am in a real hurry. Then I will have 2 or 3 worthy substitutes.
Finally, some aspects of each ruleset that might be important.
AMW
Pros – well thought out design that gives you a simple yet good range of armies with sufficient variation and interest. The core rules plus some supplementary ones do work
Cons – no command and control explicitly and if you don’t like saving throws then this is not for you.
Dux Bellorum
Pros – command and control plus the head to head fighting. Also, the ability to put pressure into the game yet not everywhere all the time. Detailed for the period of Arthur so no need to compromise on design
Cons – somehow the rules are simple yet don’t read so well or indeed stick in my mind. I was constantly referencing the book which then suffered for its small print and layout with some key parts at the foot of a page and easily missed in the heat of battle. This is a minor point as after 10 games most of the rules will be memorable.
One Hour Wargames
Pros – it is such a simple concept and with the random forces selector and scenario choices is a gem. Speed of play!
Cons – it is generic
Table Top Battles
Pros – I had a brief spell with Kallistra, Strategos and then Peter Pig. Grid gaming has generally passed me by though. I like TTB and they feel like a set I could tweak or tamper with. And I think that gridded wargames may come back into favour.
Cons – sliding towards a board game with figures. We are at the far end of wargames abstraction. Your required to do a lot of imagining.
In my last post I explained my rediscovery of the ruleset published by Partizan Press and authored by Mike and Joyce Smith.
The Table Top Battles (TTB) ruleset uses a grid. Now I have dabbled in grid based wargaming and played lots of board games which are gridded games of some sort – not a tape measure in sight!
This post is a marathon and I hope you will see that this ruleset although “gamey” has a coherence to it. So the battle flowed and compared to AMW by Neil Thomas and more so with Daniel Mersey’s Dux Bellorum rules, I had little need to keep rereading the rules.
The usual sections follow – set up, then narrative and finally a picture based step by step report.
The rules require you have a base that will fight for each discrete unit. The term used is a “stand”. The General is another base who the way I read the rules is not a stand so does not fight.
I decided to use my leader bases and gave them stand status. The “tinkerman” at work already.
Essentially the line up was a shieldwall with some skirmishers at both ends of the kings battleline. At one end the single rebels skirmisher bow faced up to the kings skirmisher bowmen. At the other the Kings men had a foot bow skirmish stand plus a mounted javelin light cavalry stand facing a shieldwall of rebel spearmen stand.
The diagram below shows the set up. The playing area was kept to a minimum.
Narrative
Earl Toki now felt confident enough to split his forces which had grown due to his successes. He left Thegn Pyrlig with his main forces while he rode to meet some Mercians who promised to come over to his side.
While Earl Toki was away Thegn Pyrlig kept a good lookout and soon enough another force appeared who were yet another collection of the Kings men ready to fight the rebels. Thegn Pyrlig soon confirmed that these were western men but not any they knew or who could be “turned”. And Earl Mathedoi was at their head again, eager to avenge his recent defeat.
The battleground was simple – a flat plain. I used 80 mm squares here as my chosen unit type for 1/72 figures is the Impetus Rules with the 15mm suggested base width! Te grid is some cotton sheeting with penciled lines.On the Earl’s left flank his mounted skirmishers rode forward confidently while his bow skirmishers looked with concern that they faced a solid rebel shieldwall.In the game pictures you will see a peter pig pink die – this denotes the aggressor. Each turn dice are thrown and the winner has the advantage or the aggression in that turn.
TTB in effect uses the “pip” idea from DBA. It is simplified to give a +1 on ALL dice throws made by the aggressor.
The pink die reminds me that my wargame story has included gridded games in the past. My hex gaming with Kallistra never quite got going even though I thought the concept excellent. My problem was the geometrical look of hexes and the fact there is a “weave” for very linear types of warfare. Maybe I was just too focused on DBA at the time. Peter Pig rules for WW2 used square grids and his Poor Bloody Infantry (PBI) rules I really enjoyed before leaving that period altogether. There the grid worked – it did not impose itself in the way hexes did.
Clearly this is a very subjective matter. It is a case of each to their own.
This is my first return to the grid technique.
The orange 12 sided dice is used to decide who is the aggressor and therefore gets the valuable pink +1 diceThe right wing bow skirmishers got into action first. A game turn comprises phases – move, fire and combat with the aggressor going first in the move and fire phases. Crucially the aggressor inflicts firing losses before the passive opponent replies: Another advantage of having the pink jersey – woops – too much giro d’italia. Did I tell you my scenery ideas have benefited to my mind from watching hours of cycling tours riding across Spain, France and now Italy!
In the aggressors fire phase shown above both units have a value of one. This value is a combination of any fighting ability and morale. It is used in all firing and combat. To this fixed value you add the result of a single D6 throw. In this firing phase the aggressor has thrown a six and their opponent just 3. So no need for the +1 here.
The result is the loser score was “slightly lower” in the dice off so the stand is moved back. Not playing the +1 pinkie is an error because it applies in every throw. And in this case had it been properly used the losing score or “Target Player” score is now half. not just slightly less than that of the “Firing Player”. In this case the stand should be removed.
The Kings bowmen are happy to retire a square relieved they were not “removed” or were they?
TTB gives options throughout and I chose the harsher results approach. Stands either move back a square or are removed from the game.
On the kings left flank the mounted light cavalry (orange value 2) beat the shieldwall (purple value 3) 7v5 (yellow dice being the random addition). The kings bowmen managed a lowly 4 which being less than the shieldwall 6 proved ineffective. The net result is the shieldwall are discouraged and retire a square. Firing is between individual bases. Combat is additive.The error is corrected and the Kings bowmen leave the field early losing to the aggressors fire turn 8v4.The Kings men throw themselves against the rebel shieldwall. Even the kings reluctant bowmen, not doubt emboldened by the kings light cavalry, have joined the fray.The General adds the value of any 1 friendly stand in an adjacent square to the combat phase. Combat is simultaneous unlike the firing. Here a shieldwall spearman stand adds +3 to both leaders. Later on the eagle eyed will see I missed a few +3 yellow dice although because the leaders never moved and were always head to head they simply raised the value of both the group scores making it harder to get a decisive result in the grouped combat.The combat allows “grouping”. This speeds up the combat process. Because I had a simple shieldwall with all units the same I could use the grouping. The kings group shieldwall score was 7×3 (21 orange) +1 aggression (pink) and a measly +1 random throw (yellow) = 25 when you add the generals bonus of +3 (yellow)
Remember those brave kings bowmen? Well they were not so brave as the rules allow some stands to engage to fire and then retire if a 4 or more on a D6 is acheived. The kings bowmen threw a 4 and with the pink dice acheived a healthy 5 to retire
The Rebels amassed 7 stands at 3 value (base score of 21) to which they added support values of +1 (yellow)from each flank unit because they faced a different unit type or had no opponent. To that you added the generals bonus of +3 (yellow) and a random +5 (yellow). total score 31. I decided that as the rebel bow were a different unit they could not get the +2 flank attack and were just allowed the +1 supporting value.The whole kings line recoiled to join the already retired bowmen in the bottom of the picture.The Kings men retained the upper hand though and attacked again next turn winning the aggression dice throw with an 8 on their D12The skirmishers attacked again the rebel right flank.By chance the rebel bowmen offered a flank to the recently retired right flank kings shieldwall and they “slid” right as you do in gridded wargames TTB style.
In TTB movement is in any direction with only a few restrictions. No penalties apply for direction change or rather they are absorbed into the move allowance. Generally units face up to their nearest opponent without restriction. The exception is when a unit is pinned on one face – then flank and rear attacks can also be made.
The rebel left flank is driven back againalmost stalemate again but now the rebels have numbers in the group combat as well (7 purple dice v 6 orange dice)yet again the kings men aggressively return to the fray (winning the D12 dice off with a 9 to get the prized +1 pink dice) having lost the last group combatThe rebel bowmen were isolated by the right flank kings spearmen and put to flight with better dice throwing and that useful +1 in pinkNext up the rebel left flank spearmen stand determined to remove the kings own flank spearmen Its that pink dice again – the kings men win this round by just 1 and drive the rebels back. The small gaming space is relevant as if the rebels get pushed off the table (or out of the ring!) they lose those stands.The rebels throw a 12 on their D12 to resume their own aggression and take the fight to the kings men.The weary shieldwall resume their struggle with the kings left flank skirmishers. Yet taking no fire damage they see off the bowmen again while the light cavalry stay too close! (failed to get 4 on a D6)7v7 is a draw in this combat so the aggressor (rebel shieldwall) gets the nod and drives back the light cavalry. The pink dice has lots of ways of rewarding the owner!Close again as the kings men win the central group combat 25 v 24 despite the rebel having that pink +1. The rebels are driven back again.The Kingsmen are feeling good and secure the pink +1 dice with 11 on a D12Out of picture the kings yellow dice of 5 is forcing the rebels back into the group combat off to the left so destroying them instead. With a 90 degree retreat arc I could have had this stand retire towards its enemy baseline. I decided this would not happen and the shieldwall just melted away having been cornered.The kings men again triumph in the pink dice competition and drive forward but it remains a stalemateon the rebel flank the skirmishers cling to the shieldwall but remain ineffectiveIn the centre the rebels hold a small advantage while on both flanks the kings advantage in numbers is clearbottom right is the A4 rule book – to hand – actually despite 42 pages in length only about 2 sides of A4 text are relevant in the heat of battle. And here the rebels again aggressively attack the kings line. In the distance the left flank rebel spearmen drift out to engage the kings spearmen on that far flank.In their movement phase the kings skirmishers again crowd around the rebel right flank scenting bloodDespite driving back the kings spearmen on their left flank, the rebel right flank has collapsed although all units forced to retire have managed to stay in the game (that is “stayed on the gaming board”).A rare aggression victory for the rebels allows them to create some space as they renew their attack. The left handside of their line though, is crumpled.on the far flank the battle remains one of two evenly matched shieldwallsThe kings men begin to turn the rebel linethe javelins of mounted skirmishers still have no impact on the resilient rebel spearmen and neither do the bowmen.On the opposite flank the rebel spearmen get the better of the fight driving back the kings spearmenalthough their flank has been turned the rebel spearmen give the light cavalry short shrift when they fail to evade after another ranging attck with their javelins. The light cavalry fly from the field. Elsewhere the rebels lose the central group combat again and are driven perilously back towards their baseline.Even so with renewed vigour the rebels defend their line defeating the careless bowmen who retireagain the kings men win the centre combat driving the rebels back further. BUT……………..And then the rule of 12 lands! The game ends after 12 turns representing the part of the day the battle was fought. The rebels were still in the field but with more stands lost victory went to the Kings men.
Thegn Pyrlig led his men from the field. Already his camp alerted to the returning stream of wounded and fleeing men had begun to get ready to move.
Fortunately Earl Mathedoi and his soldiers simply remained on the field too exhausted to pursue the defeated rebels. Earl Mathedoi cursed has lack of a reserve and especially a mounted reserve. Come to think of it where had his light cavalry gone?
So I was looking for my copies of “Twilight” the Pike & Shot Society rulesets, as I had just acquired some more of them. This was prompted by my renewing my P&SS membership. The Arquebusier journal is worth the membership alone and at the moment of course is a lifeline.
Well I stumbled across “Table Top Battles” (TTB). This ruleset I have had many years and is in pristine condition which means unused. Authored by Mike and Joyce Smith my edition dates from 2007 although the bulk of the ruleset dates from its first publication in 2000. That was the heyday? of DBx rules and for that matter Warhammer Ancient Battles was in the wings and by 2007 everywhere.
I think some of the rules ideas reflect that era well. Yet they are niche in the sense that they are “gridded”. Now gridded wargames are not new and by some parts of the hobby be simply considered as extensions of chess or board games.
Given TTB pitches its main objective at around 6′ x 4′ playing areas and 2.5 hour long games, these are not board game rules.
My current testing of Neil Thomas’s Ancient and Medieval Wargaming (AMW) and Daniel Mersey’s Dux Bellorum (DuB) using Anglo Saxon shield walls, with the odd mounted troops thrown in, has now got a new dimension.
So next up will be a report on how two shieldwalls fared under Table Top Battles.