So AHPC16 is upon us – well the 21st December is storming towards me far too fast.
In previous years – well the last two to be exact – first year I started preparing on the 21st way too late and then last year did prepare one primed unit beforehand but held off having a plan before knowing about the themes which then derailed me with a sci fi bug.
I found I was doing stuff (deciding about theme models or simply digging out figures to clean and prime) but not actually painting colour – much before the January deadline loomed into view!
So this year I started my plan in November!
And I have primed some of the planned pieces.
And I decided to ignore the theme and just see what came along.
And lucky me this years three themed pieces have fallen nicely into place within my plan.
Declining Empire should see some planned 1848 Hungarians appear
Childhood toy memory fortunately gets the wild geese treatment from the 1700’s
And rebels hopefully will see some Covenanters appear before the various deadlines
Alas last years failed star of my show might fail to appear yet again. As its anniversary related this is a constant theme – I started my 28mm stoke field armies in 2015……still not much progress ten years on!
And now I have scenery options nudging their way into my plan.
I was hoping to get some more Fauxterre 1930 kit done.
Then there were the 1848 Hanoverians, 1848 Neapolitans, 1700 French Dragoons, 1848 Roman infantry all crying out to be on the plan – the list goes on and on.
Way too much of course for this painting snail, which having done a plan shows so well. It means the exercise has proved its worth already.
However real life is very very busy right now so I might fail on all fronts!
Last week York was inundated with cameras as its annual flood season reached its peak.
Anyway if in doubt get a coffee. You can view Irregular Miniatures figures in the gifts section at the Alma cafe on copper gate
And Irregular Miniatures will be at VAP on the racecourse site so here are some of my buys over the last few years.
Austrian ww1 infantry repainted as 1850 danish Ww1 Austrians repainted as 1864 danish British colonial infantry repainted as 1848 danish British colonial infantry repainted as 1848 Tuscany troops 1859 range Straight painted garibaldini for 1848Their 1848 French opponents stolen from the 1859 Neapolitan range
I use the 20mm ranges with extra washer bases to compliment my plastics which are typically 2mm taller.
Last but not least danish artillery for 1848 although the piece is suspiciously looking a later rifled version – based up these 20mm chaps have no problem with their plastic cousins
The last photo also shows one of my entries into AHPC14!
The Second battle using my “Buildings Blast” set up saw a mid 19th century action with Austrians and Piedmontese in play. It was a solo play this time.
I used the rules published by John Curry and the “history of wargaming project” with some adaption for solo play.
Using Neil Thomas grading of troops I adjusted the firing and melee rules.
I also used the Roster system unaltered. Infantry got 4 circles and a cross while Artillery got just 2 circles in this game. Essentially in the basic game a hit meant a unit (= 1 base) was destroyed. Roster rules gave units/bases lives in the form of circles and crosses on the roster which you ticked off as they were lost.
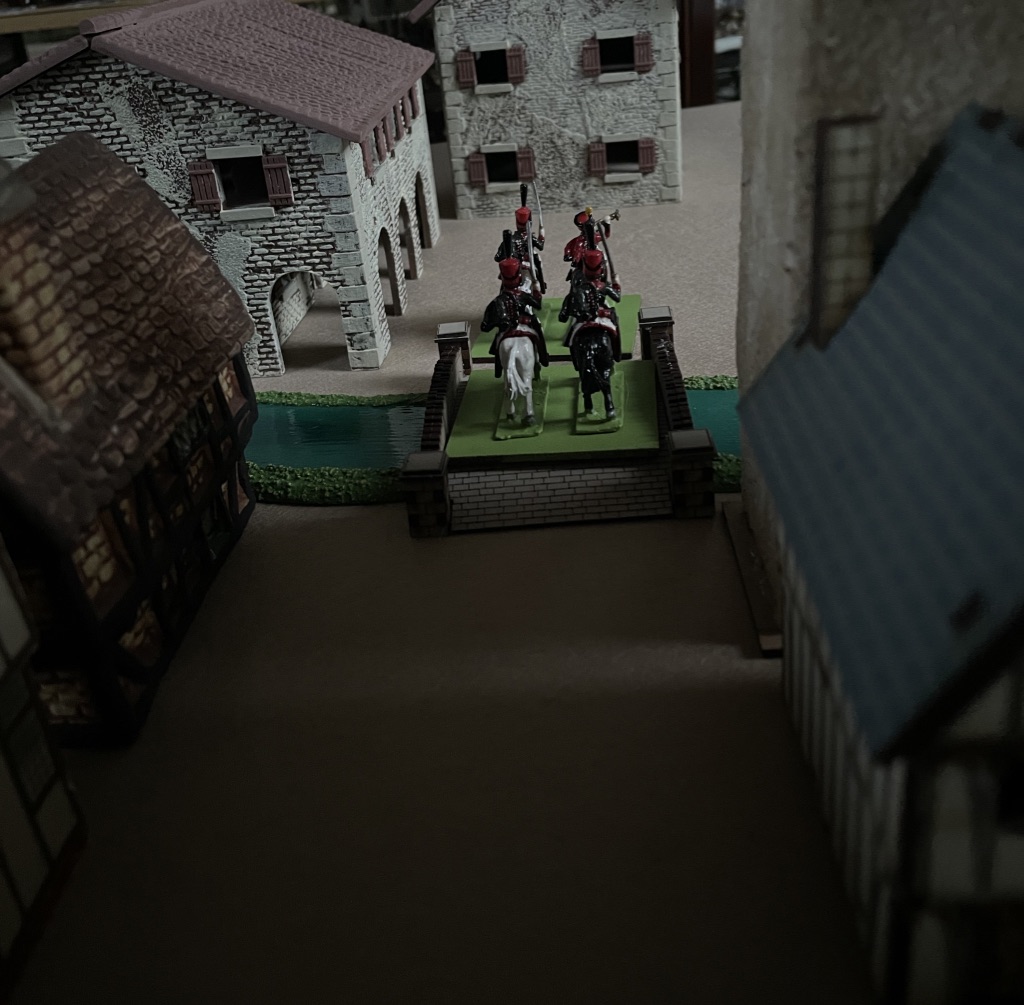
The Scenario was that the Austrians were retreating and the force here was ordered to hold the bridge in the town. The crossing was one of only a few that allowed artillery and logistics easy crossing of the river. The Piedmontese advancing from the north west had orders to seize the bridge as quickly as possible.
Forces were randomly assigned using playing card allocations along with a portion of blank entriesUnits deployed in contact and units were recognised as such at about 6 inches – the card only turned on a 2-6 D6. Here the right hand Piedmontese were certain nothing was in front of them – a heart was a dummy card while the left hand unit was not so sure so hesitated (on a d1) with no card turn. The right hand units poured forward towards the “old millhouse” spotting some real Austrian defendersThe lefthand Piedmontese units were suddenly exposed to Austrian infantry fire from a slightly sunken roadon the east side of the main road two piedmontese artillery batteries dropped into action again to be surprised by enemy troops in a slightly sunken and walled road. These were riflemen and on good form – one battery was quickly silencedHowever infantry units (white coated British Legion 1860) quickly drove them awayfierce fire was exchanged between the Bersaglieri and Austrians in the sunken road while Garibaldeans stormed the defended houses at the entrance to the townOn the east side 1859 Piedmontese infantry stormed the defended housesElsewhere Piedmontese forces had pushed on meeting little resistance (= dummy cards) to their front. A lone Austrian Artillery battery on the west side of town faces artillery and some more Bersaglieri Stubborn resistance at the Old Millhouse Finally the sunken road defenders are driven offAnd the west side Austrian defenders give up rather too quicklyexchange of fire results in another Austrian lossEven as west side Austrian defenders gather but………The Piedmontese quickly move towards their target – the river crossing. Another Artillery Battery blocks their wayOn the west side the Austrian defenders put up a good defence and with support nearby………The defended houses at the north end of town finally are overrunThe mill house and its defenders are abandoned by the Austrians who can retreatAustrian artillerists put up a stern defenceCrunch time at the town square as the Austrians are hemmed inThe Bersaglieri try to rush the ArtilleryThe Town centre defence collapses The Bersaglieri inexplicably turned tail on the west side while Lancers arrive to their rear. The British Legion finish off the town centre defenders on the left pictureThe Artillery of Piedmont watch as the last Austrian defenders in the town square are defeatedThe defended westside town square buildings are assaultedin a last desparate throw Austrian Hussars ride up the main street to halt the Piedmontese tide.The Hussars beat off the Lancers but to their rear the Artillerists are finally beaten while the East side is alive with Piedmontese. Everywhere Austrian defenders have melted away into the fields or across the bridge.The Hussars beat a retreat across the bridge bringing to an end the defence of the bridgePiedmontese Lancers cautiously follow.
The defended buildings were randomly determined and contained one unit each – no other benefits were given the building defenders. So they simply were a delaying factor assisting the mobile defenders fighting outside.
The scenario I played used a 25 step countdown and 1xd6 reduction per turn. The Austrians had to retire at countdown 16 from the edge of town, 7 – the town square and at 0 abandon the north river bank. Victory to Piedmont required they took the bridge before the countdown reached 0.
The game turns 1 to 3 were spent on the edge of town, then turns 4, 5 and 6 fighting over the town square. Turn 7 forced the Austrians back to the north bank but here ended the action as the Austrians actually ran out of defenders.
So the victorious Piedmontese captured the bridge intact and within the timescale set. There were no Austrian Engineers with a lit fuse to spoil their day! Anyway the Austrians would be back soon enough they thought…. Do I hear a Radetzky March in the distance?
For a very old ruleset Joe Morschauser’s rules played easy as I guess you would expect. With the tweaks to aid solo play they actually played very well.
I had bought the rule book for the Grid rules both the originals and Bob Cordery’s modernised version – Bob co edited the book with John Curry.
So this was a pleasant surprise to find a very playable set of “measurement based” rules into the bargain.
Neil Thomas offered this battle as an example of a small action using his mini battle setting. His rules assumed a 2’x 2′ or 600mm square. So thats board game sized.
His rules say you do not need to rebase. Always a positive these days.
I have a mixture of units – a result of my lock down era painting activity tending to paint what I fancied than worrying about actual armies!
The action is straightforward – the Danes are retreating and use a bottleneck on the key route north towards Jutland. The Danish rearguard are buying time for their main forces to retreat to their last defence line in Schlieswig – the Duppel fortifications.
suggested set up from book – copyright Neil Thomas.
Their opponent was the geographic “Empire” effectively still the Holy Roman Empire but now really the German Confederation post Waterloo with Austrian and Prussian interference/support.
In this case the Austrians were attacking the rearguard.
The Danish Rearguard
Infantry Unit A
Infantry Unit B
Infantry Unit C
Infantry Unit D
Artillery Battery E
The Artillery was Bronze Rifled while the Infantry were all Levy in loose order armed with rifled muskets.
The Danish troops are all deployed in the bottleneck.
The Austrians Attack starting at the river line comprise
9th Hussars – Average
Artillery – 2 batteries both with bronze rifled cannon
Their main forces arrive from move 1 on the main road
Jaeger Infantry unit – elite, rifled musket, loose order
Skirmishers – elite, rifled musket
On moves 2 & 3 the following units arrive via the same southern road access
Infantry Unit 6 – move 2 – average, rifled musket, loose order
Infantry Unit 7 – move 3 – average, rifled musket, loose order
Infantry Unit 8 – move 3 – average, rifled musket, loose order
Battle Narrative
With the objective to clear all danish forces from the road (at least 12cm from the road) essentially the Austrians simply went through the Front Door.
They had 10 moves to do it in with a win lose outcome and no draw.
Special Rules as suggested by Neil Thomas were used
Colonel Muller personal leadership of the Danes means any one unit at the start of any turn can be elite.
The Danish Artillery were quite ineffectual so get half the nortmal values in defence and attack
The Austrians fresh from rough handling by the French in 1859 adopt bayonet charges in preference to distance firefights. They stay in column the whole game and can charge without restriction (no unit base quantity advantage required)
Some shots of the action
Danish defence face the Austrian advance guard
The stream has no effect on movement except Artillery must use the bridge. The town can be accessed only by Infantry. The lake is impassable to all troops while infantry can move through the wood.
The Austrian battery drops into action as the 9th Hussars begin their fateful attack
The Danish front line are in line and not moving, supported by more mobile Column units behind. If infantry want to move in Neil Thomas’ rules they must be in column.
The 9th Hussars much reduced by musket fire charge home. The Austrian Skirmishers have made little impact but the Artillery have seriously depleted the Danish infantry to their front.The Danish front line has been blown away by the Austrian Artillery and the Elite Jaeger unit
Note in this game I chose not to field the woeful Danish Artillery ( i.e. I forgot to place them on the board!)
The second line of Danish infantry eventually destroy the Elite JaegerBut at the cost of another Danish unit when more Austrians charge homeIts the end of move 10 and the final Danish defence was about to be overrun by the Austrians
An Austrian victory seemed to confirm Neil Thomas’ view that history repeats itself with his suggested set up. In his notes he offers several options to up the defence capability of the Danes.
In this case a very narrow Danish Victory suggests a well thought out scenario by Neil Thomas. Generally I have found Neil Thomas scenarios are fun to play because they tend to lead to a lot of action and no quick outcomes. So although asymmetrical in set up they seem to be well balanced games.
Footnote:
The Figures are Irregular Miniatures and Hat for the Danish
In this picture top right clockwise – 1848 Danish Infantry, 1849 Danish Infantry then 1864 Danish and finally some rogue 1860 Piedmontese.The Austrians are top left clockwise Hat Grenzers – being Skirmishers then Minifigs (1970’s) French Hussars posing as the 9th, Waterloo1815 1859 Austrian Artillery and finally the elite Jaeger are WW1 Belgians painted as Neapolitan 1859 Cracciatori Light Infantry
Elsewhere in the photographs the regular Austrian Infantry on show are Waterloo1815 1859 Austrians in their white coats – in 1864 it was bitter winter weather so soldiers actually fought in their greatcoats.
Neil Thomas offers the mini game as a quick affair and it certainly was. Lots of enjoyment from a two foot square, scenery, dice and some figures.
These Austrians sporting waffenrock full skirted tunics and tapered stove pipe shakoes are really post 1850 . This time I have two weak units representing Infantry Regiments 40 and 41.
IR40 Baron Koudelka 1834 to 1849 probably means the men with light blue facings are from IR40 Inhaber (Ceremonial Commander in Chief) Baron Rossbach who took over in 1850.
IR41 with sulphur yellow facings, under Baron Sivkovich from 1841 then handed over to Baron Kellner in 1857
These are weak Field of Battle Battalions at only 3 bases. Right now I tend to paint the figures by sprue and “Waterloo 1815 manufactured” Austrians come with 10 figures including a mounted officer. So I get 3 bases of 3 foot figures.
I use the excellent Osprey Men At Arms 323 by Darko Pavlovic as my main reference.
This Austrian Artillery Battery works for the 1st and 2nd Italian Independence Wars of 1848/49 and 1859/60 respectively. We are still in muzzle loading smoothbore territory but with rifling growing in popularity.
This time I opted for individually based figures.
Previously I had based some of them for Piquet Field of Battle rules.
The artillery pieces are Irregular Miniatures Russian guns.
Along the coast from Bangor City is Conwy. Apart from its famous estuary and castle the town boasts a compact old centre of shops including a bookshop.https://www.hintonsofconwy.co.uk/
In very recent times I have become a lot more interested in Austria and its post Holy Roman Empire era.
Apart from the bookshop, good variety of eateries and some nice food shops, the town centre retains some fine buildings.
Yes its Chester and another great find in a real model shop.
in the covered arcade of this impressive building was a fantastic findI did notice in this shop that Airfix and other “UK brands” were dominant – the shop did not look like it lacked for business so maybe imported stocks are a problem? – or maybe Chester folks love Airfix!the place was awash with metcalfe card kits – I had seen this gatehouse advertised but this was the first time I had seen one in a shopThe 1/72 figure ranges seemed much reduced – empty shelves. The Hat Austrians were regular as expected but the Waterloo1815 1/72 figures I nearly dropped – caught out by their weight! both sets were the last ones on show and were old stock I think – and in metal!!!!!ok just 6 men on horseback but I had to have them.
Rarely do you find metal figures on the high street. I got lucky!
Colonel Ansaldi was fretting – having gained so much from the raid on Austrian storehouses he was worried that none of his scouts had been able to stay in touch with the Imperial troops known to be in the area. What he would give for a decent squadron of guides…….
Meanwhile not far away Colonel Albrecht considered the recent reports, nearby Austrian Hussars were watering their mounts. They had ridden hard to report finding the raiders. Now we shall obtain some satisfaction from those Sardinians thought the Colonel……..
Colonel Ansaldi cursed as the nearby hill was clearly occupied by troops – and they were not friendly – Austrians! To arms, to arms, went up the shout.
Looking South the Austrians were well placed on the hillThe Scenario 25 straight from One Hour WargamesThe random force generator gave Blue (Sardinians) only infantry while Red (Austrians) gained some Cavalry to support their infantry
The Sardinian force consisted of 3 infantry units and 1 skirmisher unit. The Skirmisher unit headed for the Austrians on the hill
The Scenario Set up required one unit of Austrians on the table before the Sardinians arrived from the south west heading north. The Zone 1 was the required deployment area for the one Austrian unit, in this case some skirmishers (note I used 4 bases per unit for both line and skirmisher foot troops)
Already a brisk firefight had broken out between the two sides.
There was no time time to lose and anyway there was only one direction the Sardinians could take and that was straight past those Austrians on the hill.
Despite orders there was hesitancy on the part of the Sardinians who still traded fire with the lone Austrian unit. Now other forces appeared – infantry and cavalry!
Cavalry and Infantry appeared from the north on the main road the Sardinians had avoided. (the rules included random arrival of reinforcements)Things are not looking good for the Sardinians
Panic breaks out in the Sardinian ranks. I used the solo rules chance table which offered confusion, ammunition shortages, demoralisation, initiative, rallying and enemy panic.
the skirmisher firefight was prolongedsome good luck (chance) means the Sardinians move swiftly past the hill.The Austrian Hussars close in on the Milan GuardIt looks like the Sardinians are moving clear.
The Sardinians continue to push on with their escape.
The Hussars clash with the Milan GuardIt all hinges on whether the Hussars can hold up the escaping Sardinians
The Austrians continue to press with a further charge by the Austrian cavalry despite them being demoralised.
The Sardinian firing slackens off – Colonel Ansaldi sends a runner to find out what is going on. (chance intervenes)
Suddenly there are Austrians everywhereMore Austrians troops arrive on the Main Road from the South. Aiming for the road was now a problem for the SardiniansMore chance favours the Austrians whose Infantry march rapidly up the road while the Cavalry catch the Sardinian SkirmishersThings are looking bleak for Colonel Ansaldi as the Milan Guard break before the Hussars repeated attacks
But finally the Austrian cavalry also retreat as things are just too hot. Meanwhile the Austrian fire is good and effective and they continue to press the Sardinians.
The Hussars break while the Austrian Infantry close in on the remaining two Sardinian unitsThe Sardinians must exit the road northwards with two units to secure victory. Despite the Piedmontese Infantry driving off the Hussars, the Sardinian Skirmishers fail to reach the safety of the woods before being crushed by the Austrian Cavalry
Now on the point of victory the Austrians seem confused. Yet with a final effort they corner the Sardinians.
The Piedmont Infantry leave the field while the second Milan Guard unit is decimated by the pursuing Austrians.Its all over as Blue force Sardinians fail in their mission to exit two units northwards on the main road.
Colonel Albrecht curses his cavalry – they are blown and clearly fit for nothing as some of the Sardinians are still making good their escape. He calls for some scouts.
Later Colonel Ansaldi manages to regroup his shattered forces and with poor pursuit from the Austrians is able to restart his march back to Sardinian lines by a new route. Later many more of his dispersed men come in.
The solo rules regarding random confusion, demoralisation, panic and ammunition shortage added that “unknown/unexpected” element to the game that a real opponent usually brings. The interventions were not gigantic but did chip away at each forces potential.
Early on the Sardinians were stalled, then gained initiative before the Austrians finally gained lots of initiative to enable them to hem in the Sardinians even with a hesitation at the end.
Next up the Sardinians, having continued their march, encounter more Austrian forces intent on preventing their escape.
A Gentlemans War or “Glossy Coats and Tin Bayonets” is a bit different to the previous rules tested. It is much more towards a skirmishing style and is definitely for enjoyment of the game. These rules are aimed at the period 1875 to 1914 so are a bit later than my interest.
The losses are per figure so the units were
12 man infantry brigades
4 man field artillery batteries
6 man light cavalry brigades
I used their 1850-1875 shooting modifications to the rules
Essentially it shortens all the ranges giving you just rifled muskets or smoothbore cannon.
I ran out some new playing cards for this game.
Modern playing cards in a victorian style.
With a normal playing card deck red cards work for one force, black for the other.
numbered cards allow singular activitions
court cards allow brigaded activations ( I did not use these) or singular activations
ace allows double move and cannot be held in the hand
cards in the hand are used as hold cards to be used as above
cycle ends when every unit on one side has activated
first joker end all cycles – with all disorder markers removed
both sides start new cycles
second joker – cycles end plus all held cards are discarded and packs reshuffled for a restart
Marshall Radetzky squares up to the Rebels led by General Durando. On the left is the Austrian line – Hussars, Benedek Line Infantry, No1 Field Artillery with Erzherzog Albrecht Line Infantry in the distance. On the right the Milan Infantry Brigade with A battery field artillery next then the Bersaglieri di Vignola and finally in the distance the 3rd/6th Line Lancers.
The set up was identical to previous tests and the Orchard was inaccessible to all arms, while the road offered some benefit.
The Empire Forces were
left flank – Erzherzog Albrecht Infantry
centre left – No 1 field artillery battery
centre right – Ritter Von Benedek Infantry
right flank – Graf Radetzky Hussars
The Republican Forces were
left flank – Milan Brigade
centre left – “A” battery field artillery
centre right – Bersaglieri di Vignola
right flank – 3rd & 6th Line Lancers (combined)
The action was swift with the rebel lancers charging first……
The 3rd/6th Line Lancers charged the Erzherzog Albrecht Infantry inflicting alittle damage but taking heavy casualities from the Austrian Firing and then in the melee.
As they charge in the Austrian Infantry fire scoring on 5 or 6 on 1d6
Rebel saving throws on a 5 or 6 mean only 2 hits make a mark. Yet this meant 1/3 losses 2 out of 6 men killed so a morale check was required which said the Lancers were “bothered” but continued their charge albeit “lukewarm”.
In the melee the “advantage factors” were with the Austrians meaning the Lancers needed a 6 to hit against 3-6 for the infantry. 6 hits on the cavalry halved meant the remnants of the cavalry ran away (1 cavalryman!) while the infantry were reduced by 1 man to 11.
I did not do figure removal but either way the Lancers are in full retreat. The Beraglieri are arriving to engage the Austrian artillery in the foregroundMeanwhile an exchange between the Von Benedek Infantry and the Piedmont Artillery resulted in the artillery being “disconcerted” so they ran away. In return the Milan Brigade fired on the Von Benedek Infantry
The Bersaglieri attempted to rush the Austrian artillery but became “bothered” and had to retreat. while a fierce firefight took place between the Von Benedek Infantry and the Milan Brigade.
Eventually the Von Benedek Infantry became “disconcerted” – morale test on 50% losses, and ran away.
Von Benedek infantry flee after firefight with the Milan BrigadeThe Austrian left flank is relatively unscathedIn the distance the General Durando returns having failed to rally the piedmont artillery while in the foreground the Austrian Hussars have lost almost all their men to the Milan Brigade firing and then repelling their chargeThere is still possibilities of action on the Austrian left flank. Again the Austrian Artillery “bother” the Bersaglieri who run away again only to be rallied by General DurandoFinally the Hussars are destroyed by the Milan Brigade – in this game I used dice to show accumulated damage for a change!The Milan Brigade now move against the Austrian left flank, getting favorable cards they fire on the Austrian Artillery who are “disconcerteed” and fall back.
With just one infantryman left in the Erzherzog Albrecht Infantry the game is up for the Austrians as the Milan Brigade still numbers 10 men and the Bersaglieri have 8 although they keep running away!
So General Radeztky decides to quit the field. General Durando celebrates a great victory largely down to his Milan Infantry brigade which destroyed the Hussars, routed the Von Benedek Infantry and drove off the Austrian Artillery almost single handedly.